This article extends what README or
buildr homepage already briefly described. It’s identical
to the vignette, but it includes a bunch of animated examples. After
reading it, you’ll be familiar with:
- how to work with buildr using your own keyboard shortcuts
- how buildr works under the hood
- what is a
Makefileand how buildr uses it - tips for some advanced usage
{buildr} + RStudio = ❤️
It’s easy to work with buildr by printing function
calls in your R console. However, much more feasible is to
use buildr as RStudio Addin, which plays nicely with
keyboard shortcuts, adding to the comfort. buildr addin
commands are available below your toolbar in RStudio just upon the
installation:
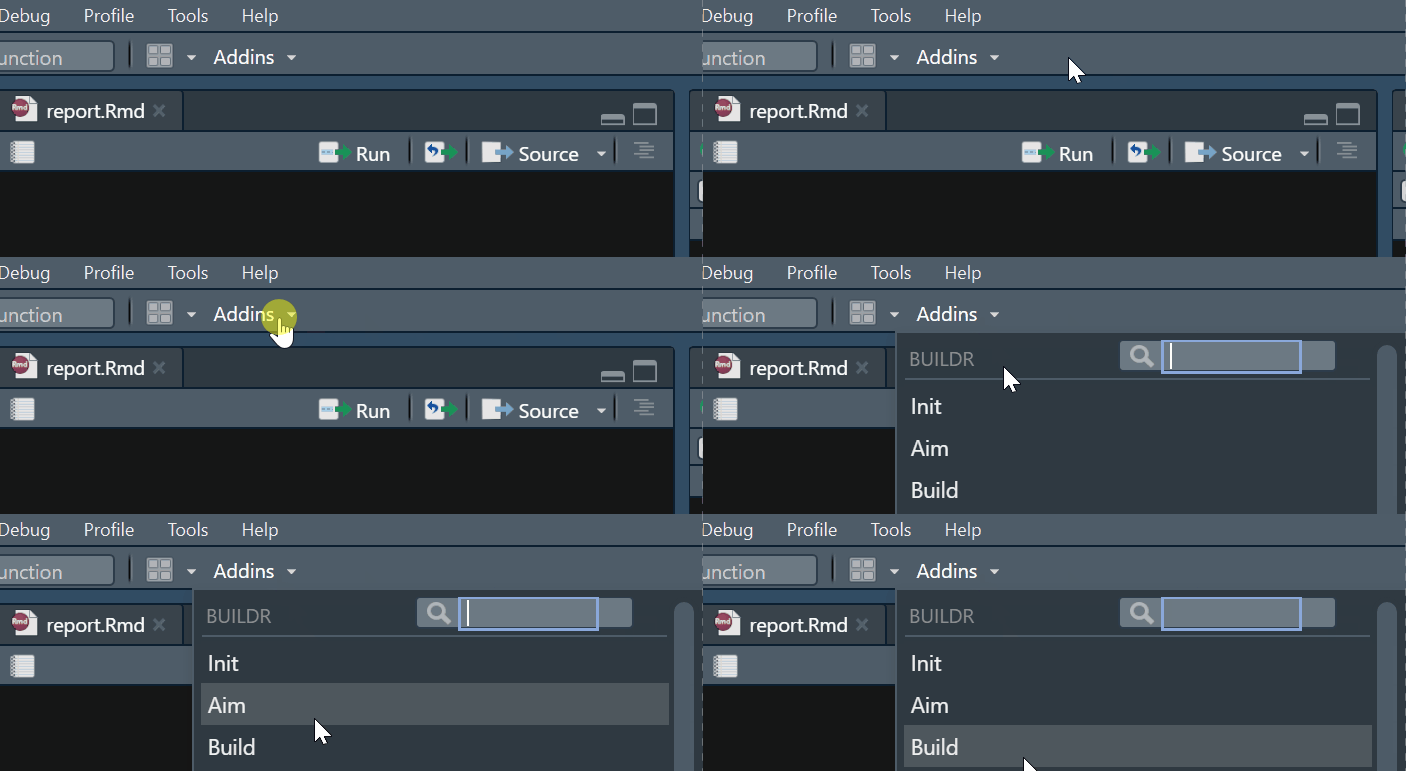
Well, that’s pretty neat, but my time is precious and I don’t mean to spend it by clicking around that tiny toolbar.
Likewise! Here come the keyboard shortcuts. The quickest way how to
set them up is to use buildr::edit_shortcuts() as shown
here (for build() addin command):
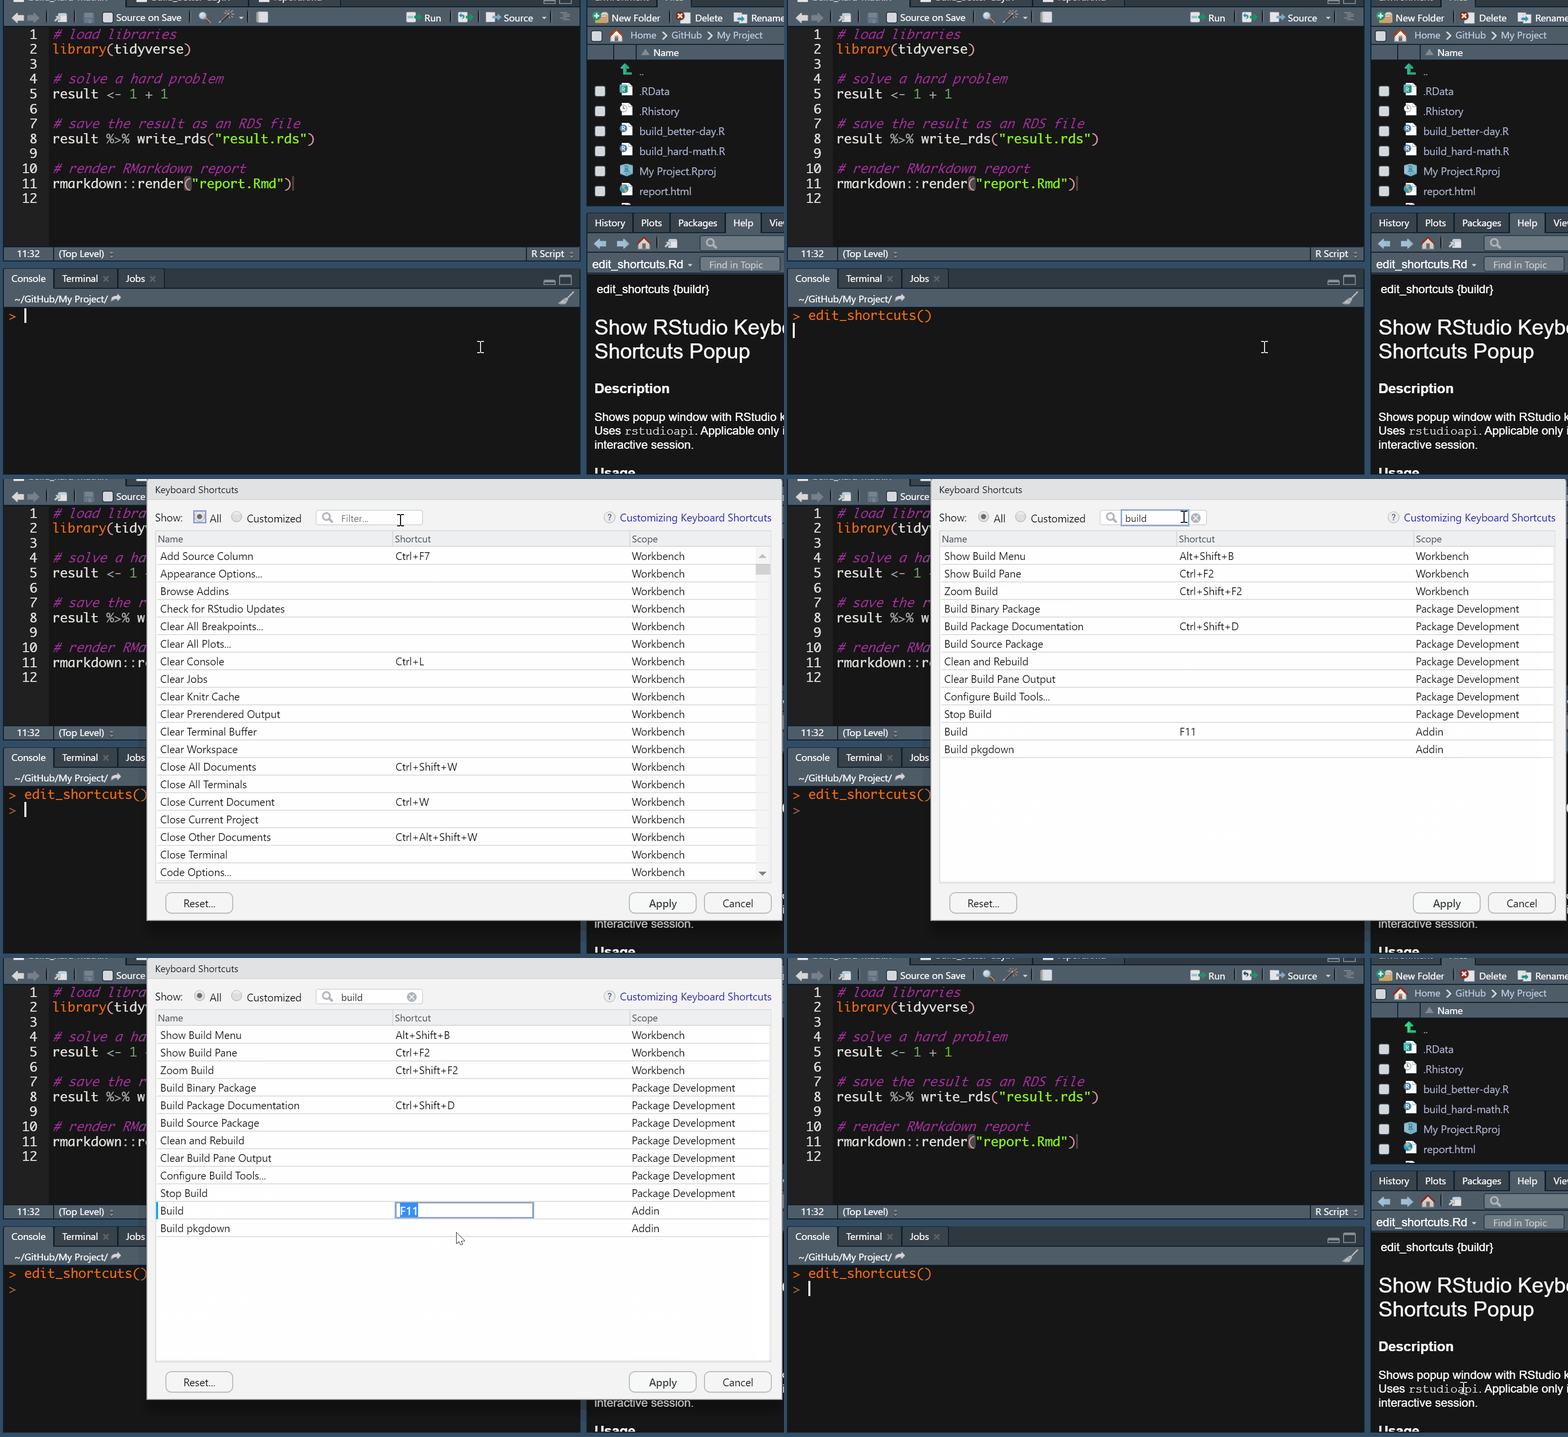
Note that all three functions are supported as addin commands. If you
stick with recommended defaults, there is no need to use anything else.
The only function that may need a richer user input is
init(). Let’s describe it in more detail.
Let’s see what you got there
The init() function should be called first (and only
occasionally afterwards). It searches your project root (the directory
where your .Rproj file resides) and looks for
.R scripts that shares a common prefix separated from the
rest of a file name by a separator (“build” and “_” by default,
respectively). Although it is possible to use different prefix and
separator, we recommend that you stick with the default. For more
details, please see the reference (documentation) for the
init() function.
Those “build scripts” can do really anything, that’s up to you. Commonly, they share the following:
- loading of libraries
- sourcing some
.Rscripts, e.g.,source("run_this.R", encoding = "UTF-8", local = TRUE), which can do a bunch of things, like:
- downloading any remote data
- cleaning them
- estimating some “heavier” models, saving their output
- finally, you’d typically include some rmarkdown call,
say
rmarkdown::render("my_report.Rmd")
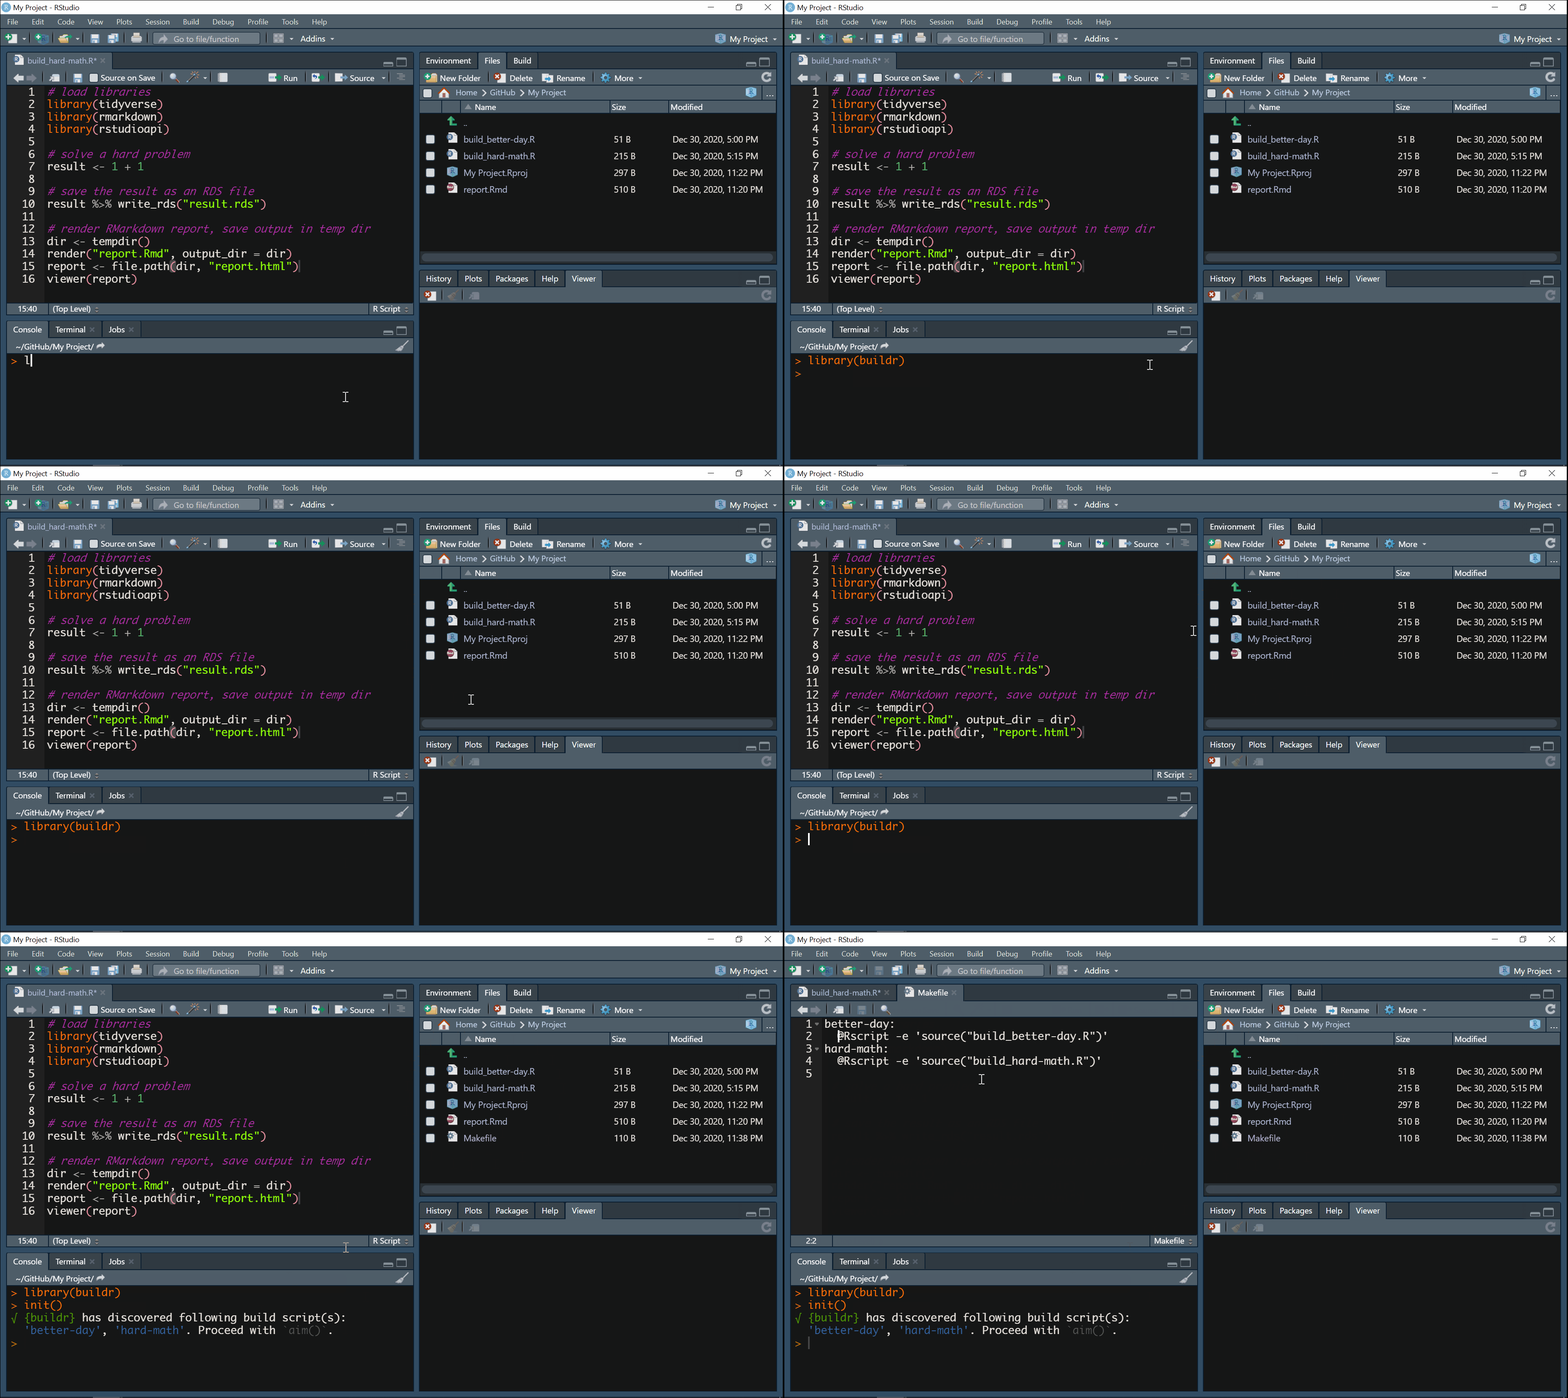
Here is init() in action:
Line up your bricks
Once the buildr discovered your build scripts, it
automatically creates a Makefile in your project root for
you and populates it with rules describing how to run your build
scripts. Let’s make a little detour and talk more about
Makefiles more (you can skip this section if you
just want to use the package and do your stuff).
target:
  recipe
A target is usually a file name, but in our case, it is an arbitrary
string uniquely identifying given Makefile rule. A recipe
consists of a command describing what to do. In our case, we want to
source a .R script, say build_all.R, so our
rule would look like this:
all:
  @Rscript -e 'source("build_all.R")'
The target of our rule is “all” and the recipe instructs the computer
to quietly (hence the @) start R and source
the script “build_all.R”, which resides in your project root. Note that
Makefiles are whitespace sensitive. A tab must always
precede the beginning of the recipe. Again, you don’t have to
bother with any of this, as the buildr does everything
for you.
Now you may wonder why this section is called “Line up your bricks”?
That’s simple. The purpose of aim() is to line up the
Makefile rules in a particular order because the RStudio
Build pane always takes the first rule available (in fact, you can
specify the target manually, but it is buried deep inside the GUI). The
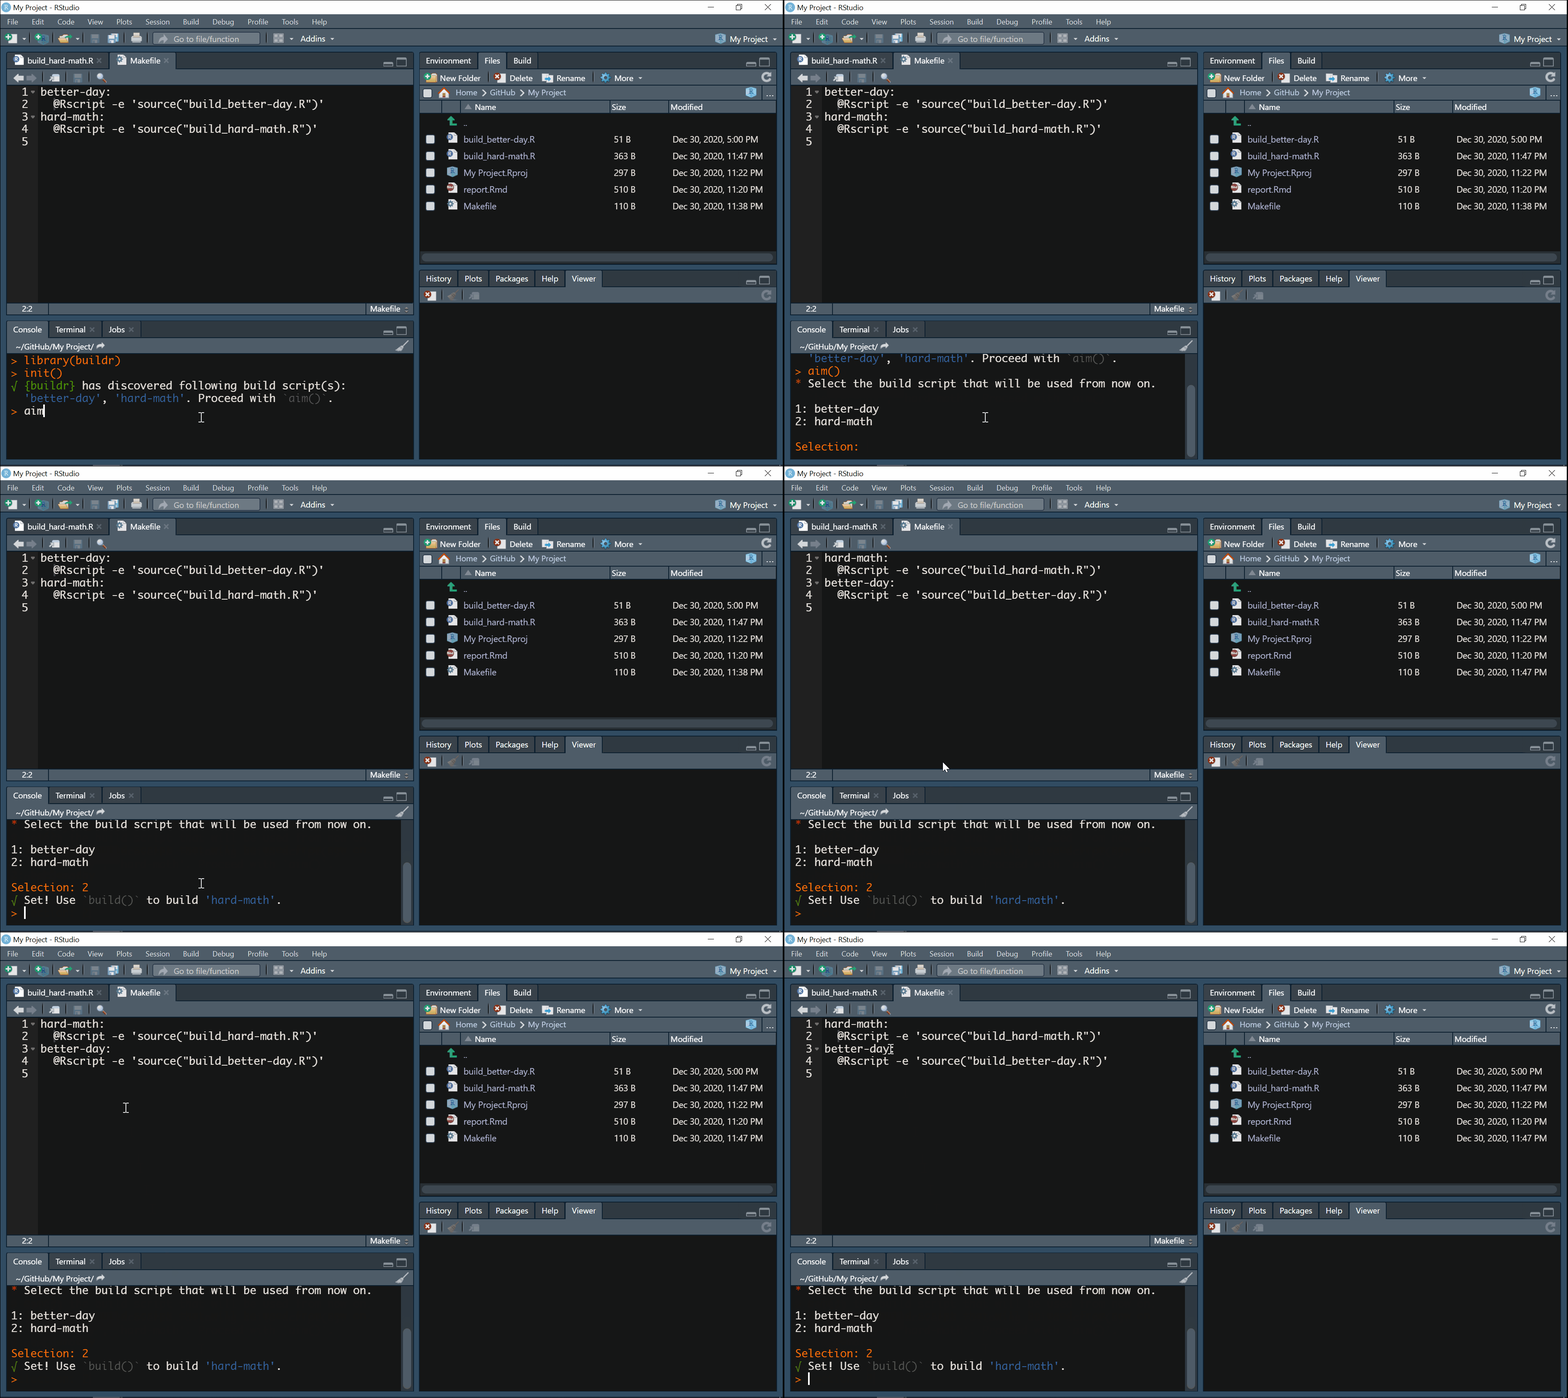
goal of aim() is to list your Makefile rules
and show them so that you can pick the one you are interested in
(i.e. to prioritize it). Your choice then projects in the actual
Makefile – the desired rule is in the first place. That’s
what aim() does. In case you already know the target of a
given rule, you can just supply it directly in the call like this:
aim(target = "all") or even simpler
aim("all").
Here is aim() in action:
Build
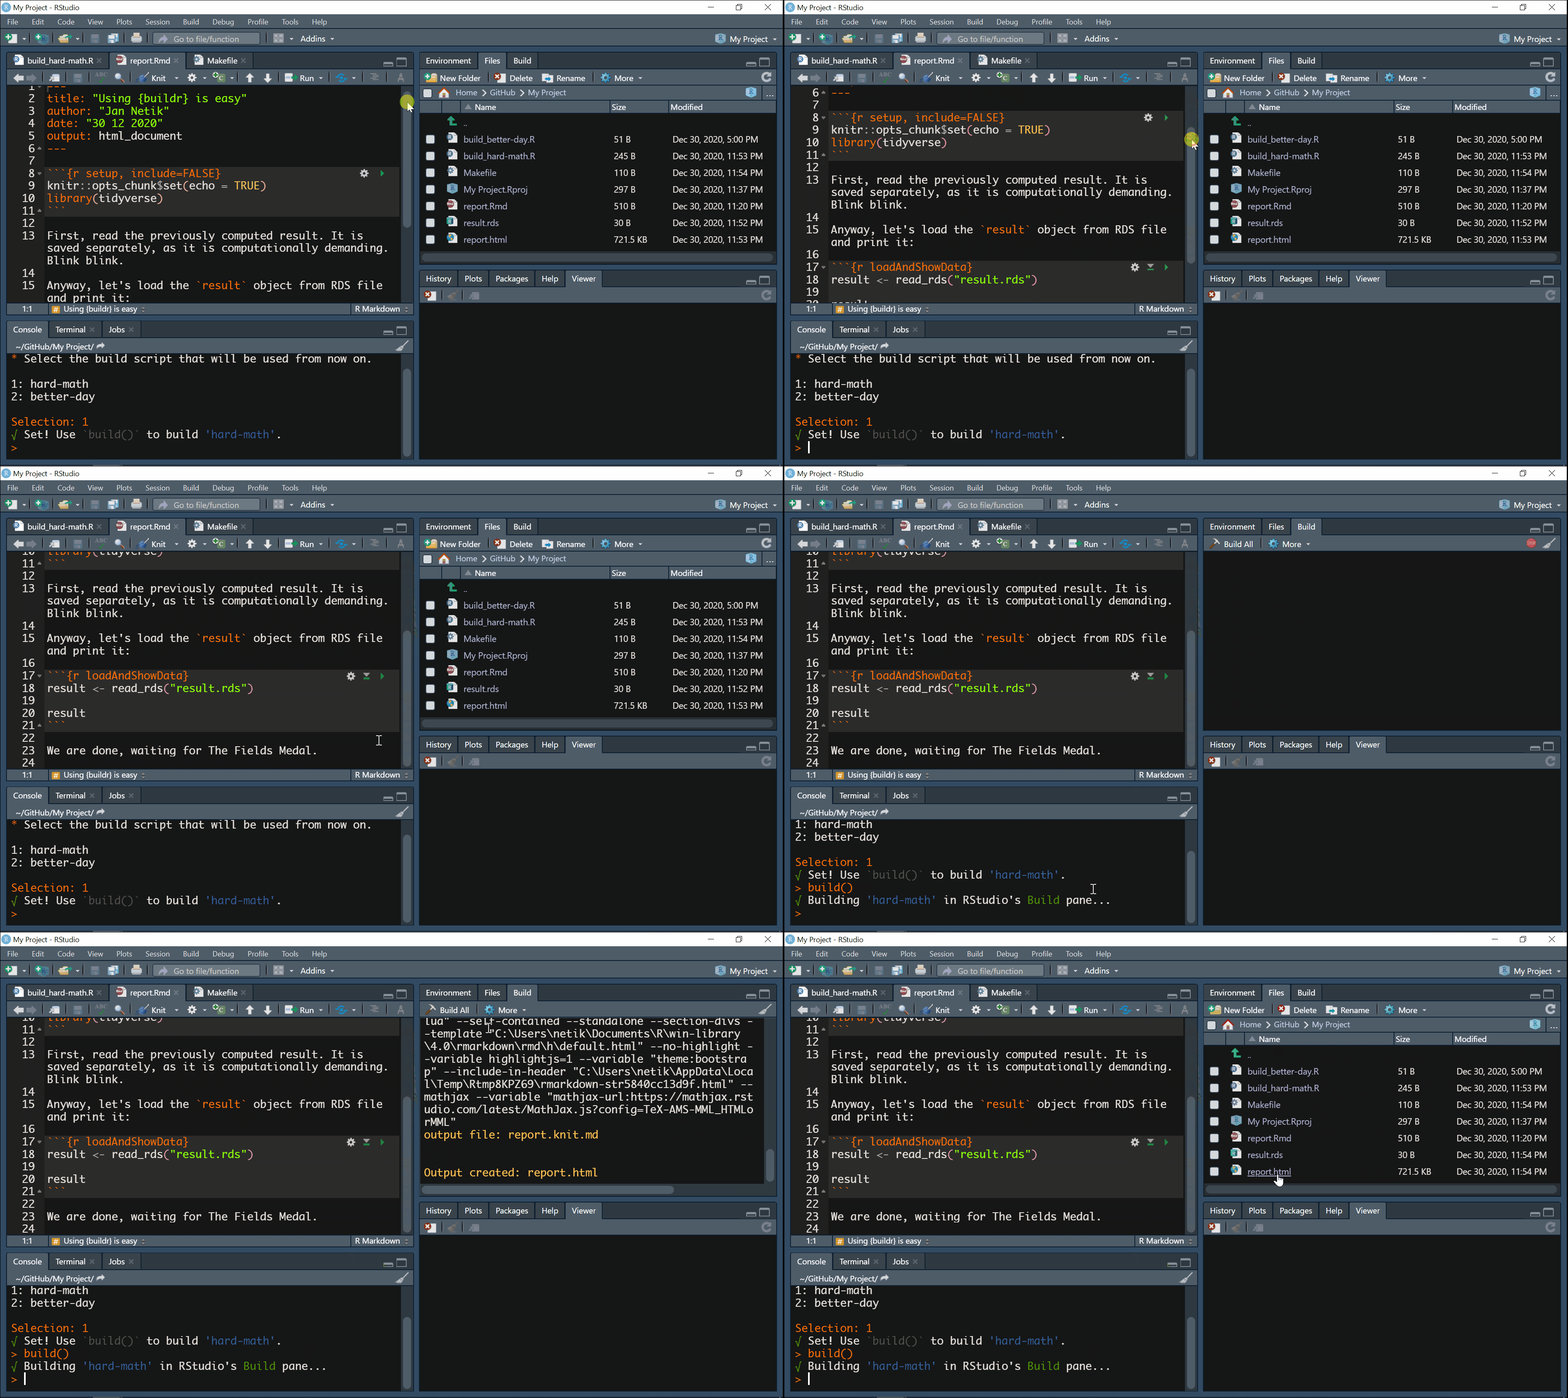
Now that everything is set-up, your only task is to call
build(). Under the hood, buildr makes sure
that RStudio is set appropriately to handle the Makefile.
RStudio Build pane may be set for building packages or websites, so it
is crucial to ensure your script is run nice and clean. In case
something is wrong, buildr automatically offers you a
remedy.
Here is build() in action:
What’s next?
If you’ve already dived into the documentation of the package, you
might still wonder what is the purpose of command_args
argument of init(). When the build script is processed in
RStudio Build pane, the recipe may be accompanied by so-called “command
argument”. This argument can be picked up by R and used in
your build script to further specify how it should be run. In order to
use it, state your command argument when you initialize the
Makefile using
init(command_arg = "my_argument") or manually. Note that
the command argument will be placed after each rule’s recipe.
In future updates, this may accommodate a vector of command arguments,
but there are many things to solve yet. Then, include the following line
to your script:
command_args <- commandArgs(trailingOnly = TRUE)The object command_args that you’ve created by the
assignment will comprise the command argument stated in
Makefile when it is run, and you can further use it inside
your script. E.g., you can query whether specific command argument was
passed by
if ("my_arg" %in% command_args) {print("Yes")} else {print("No")}.
I want more complexity!
The buildr was made with simplicity in mind. It helps you bind a given script with a single keystroke using only a handful of functions. The content of such script is completely up to you. What you code is what you get.
However, if you don’t mind delving a bit into new and slightly complicated things, I warmly recommend you to take a look at drake package or at its successor, targets.
And as always, happy building!
